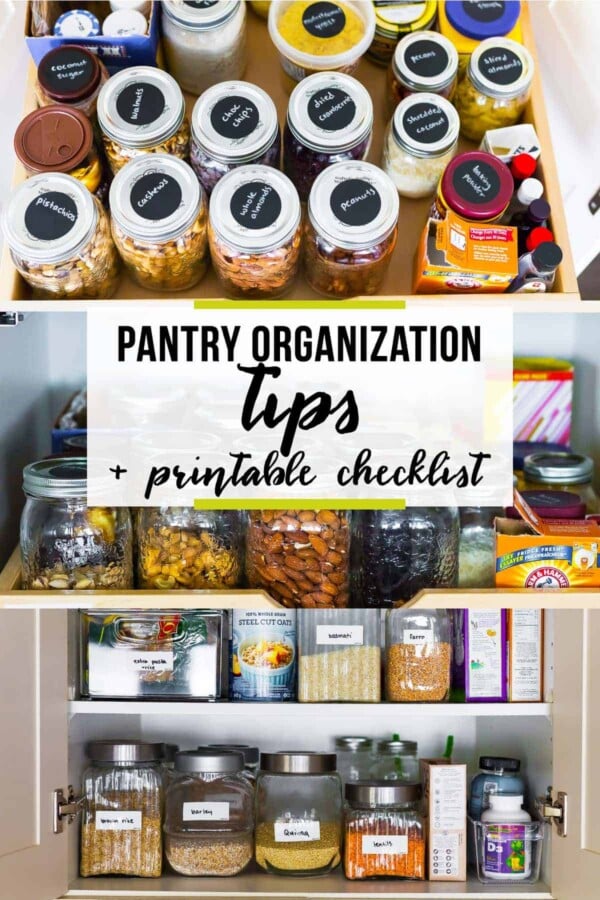
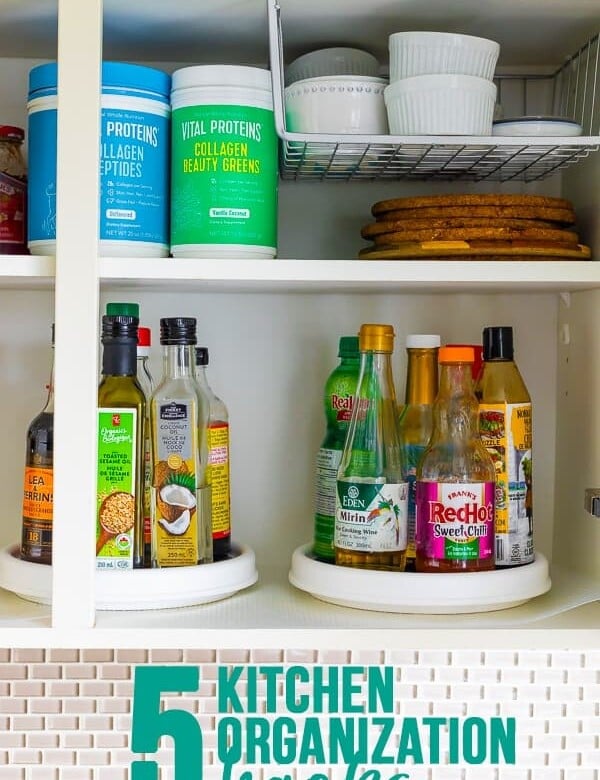
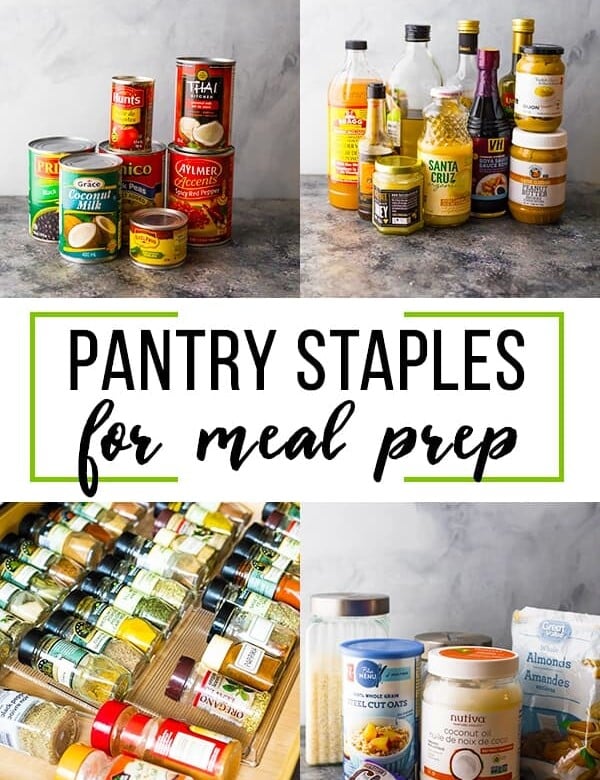
After detoxing my pantry, I'm sharing all my pantry organizing ideas with you, including a printable checklist that you can work through.
After sharing the pantry staples I use for meal prep with you, I decided it was finally time to tackle pantry organization.
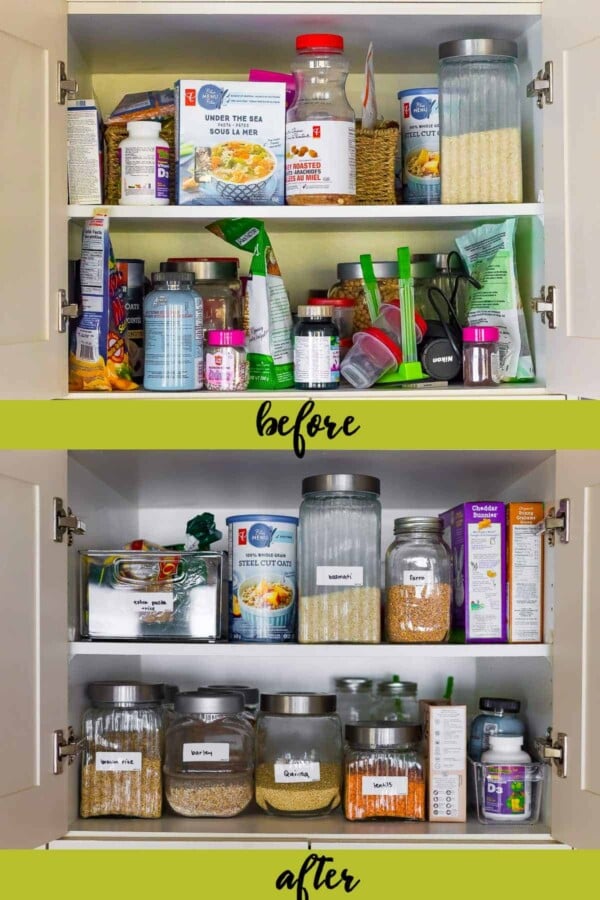
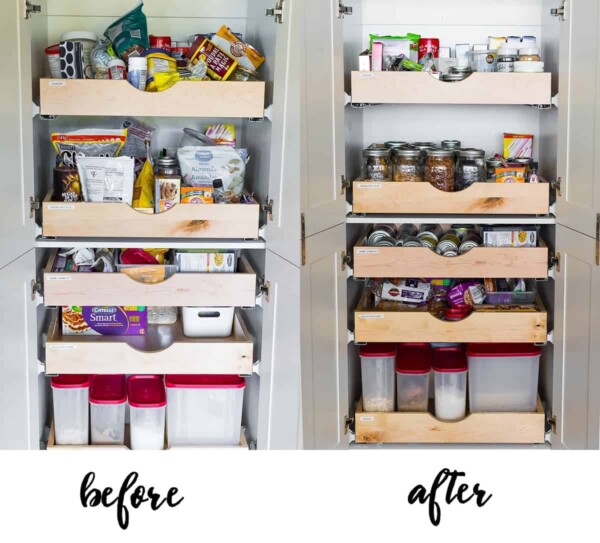
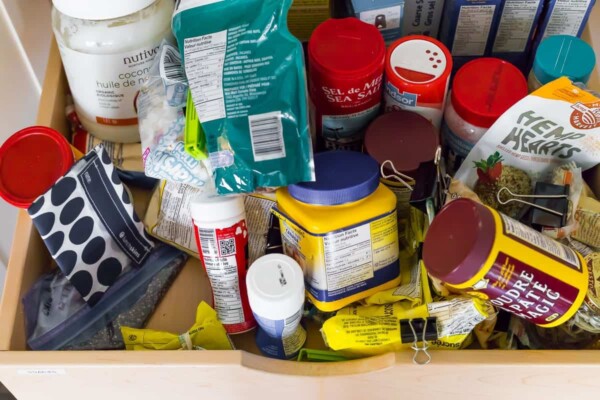
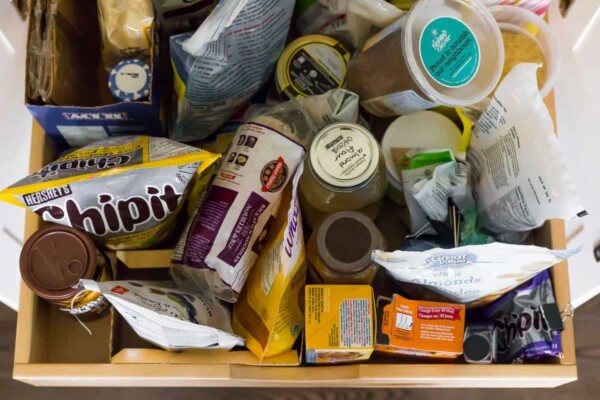
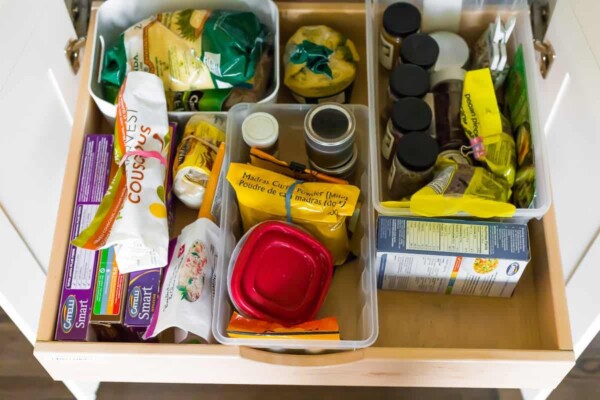
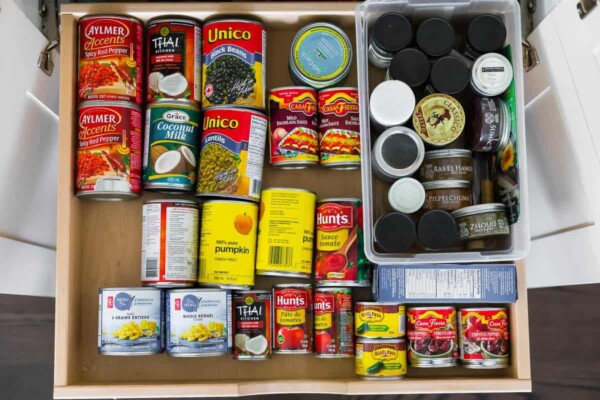
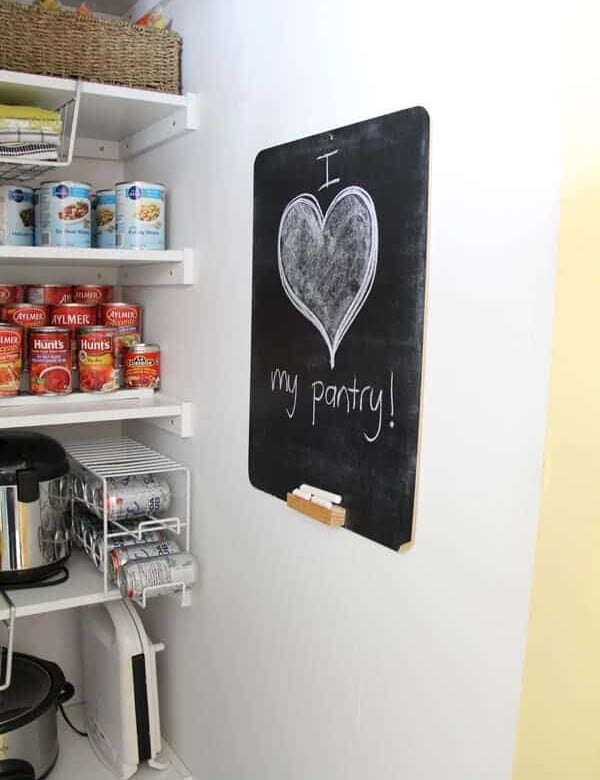
Organization does not come naturally to me, it is something I have to work at. Proof? Check out the 'before' photos of my pantry. My pantry sat in this crazy, disorganized state for almost a year (a YEAR!!) before I finally got my act together and got things organized.
I am telling you this, because I want you to know that even if you are not an organized person 'by nature', YOU CAN DO THIS. And once you get it into an organized state, it is so much easier to keep it that way!
Don't forget to pin this post to save it for later!
These pantry organization ideas will help you by
- making it easier to find see exactly what you have (and less likely to forget to buy more)
- making it easier to use up your ingredients before they expire
- giving you so much peace of mind!
Pantry organization tools
You are probably not going to believe the one thing I use the MOST in pantry organization. Are you ready for it? Binder clips!
That's right, I use binder clips to seal all the 'odds and ends' bags shut. Sure you can spend a bunch of money on chip clips or other bag clips but I don't find they work nearly as well as binder clips!
Other tools you can use in implementing these pantry organizing ideas?
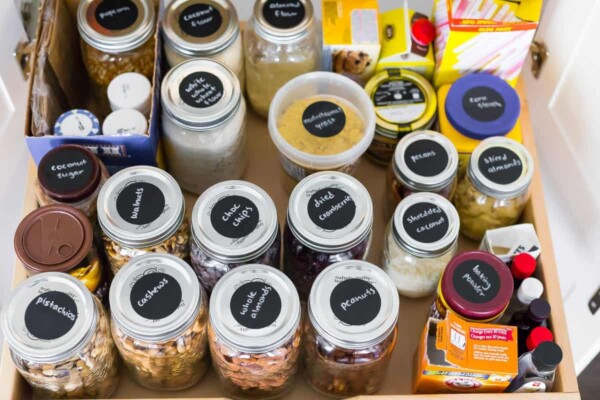
- quart-sized jars
 are great for nuts, chocolate chips and alternative flours
 - pint jars hold less frequently used nuts
- ½ pint jars hold seeds
- larger glass containers (for rice, pasta, lentils, chickpeas)- old from Ikea
- large deep bins- for large volumes, I use for random 'refill' bags, infrequently used ingredients
- narrow bins (for vitamins)
- chalkboard labels for mason jar lids
- reusable labels
How to organize a pantry
1. Audit & consolidate
The first step to an organized pantry is to pull everything out.
- Toss expired items
- Consolidate when you have multiple bags or boxes of the same item
- Take stock of exactly what you have in there
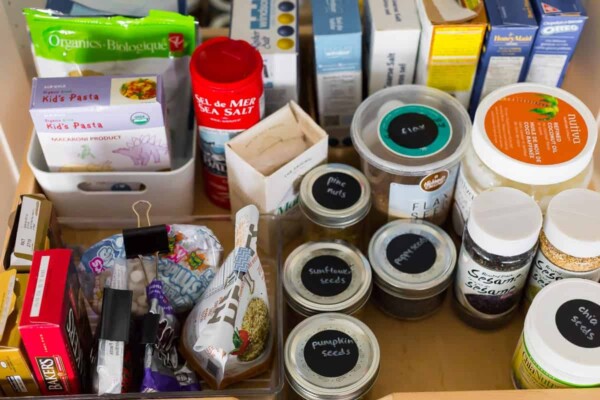
2. Sort by category
Group 'like' items together. Baking goods, nuts, seeds, smoothie add ins, pastas, rices & grains, you get the idea. Grouping them together means you'll always know where to look for those items. Give each ingredient type it's own space.
- Group them in boxes or bins
- Spice racks or can holders can help organize them further
- Labelling shelves, boxes or bins can help you keep your space organized
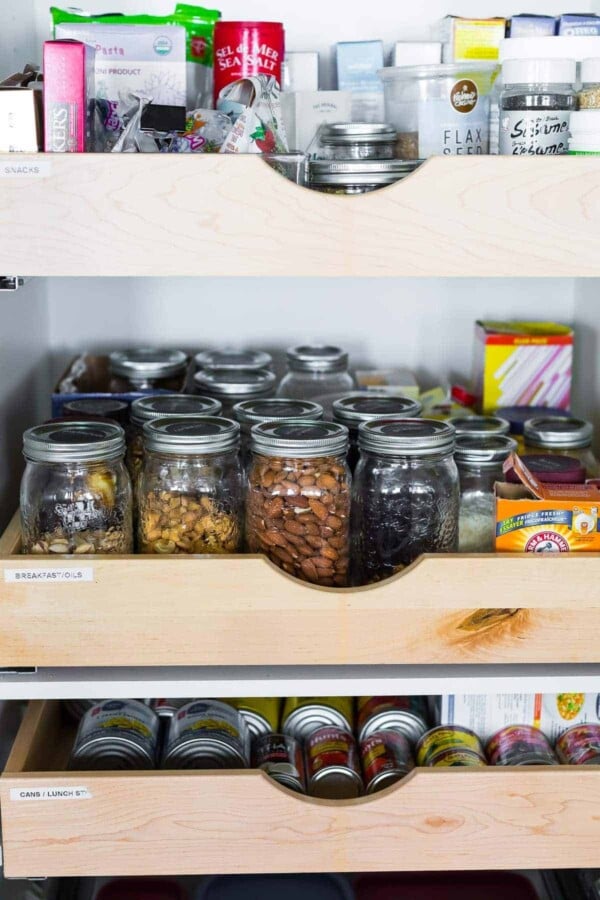
3. Clear storage
When you can't see something, it's so easy to forget you have it. That's when you start accumulating multiple half-used boxes of pasta or five bags of sliced almonds. Clear storage can help you know exactly what you have in your pantry, and it helps you find ingredients quicker too!
- Jars are great to store smaller-volume baking supplies, nuts, seeds, etc
- Clear bins are great for holding bags or less frequently used items
4. Label!
It's not enough to be able to see through the containers, having them clearly labelled is going to make it so much easier for you to find your ingredients.
- I love these reusable labels for bins & storage containers
- I love these chalkboard labels for the lids of mason jars
- Some people even like to keep an inventory sheet
5. Re-evaluate
Give things a test run when you implement a new organizational strategy. Sometimes things don't feel right, and need to be rearranged. Keep in mind that nothing is set in stone, and things may need to be tweaked.
![]()
I hope you found these pantry organization ideas helpful! I am loving having such an organized pantry and can't wait to tackle some of the other cupboards in my kitchen soon.
Have a great day,

Karey says
Denise, you've done a great job of Categorize and Conquer! In a small space (tiny sailboat), I have a clear bin for grains & another for legumes. Each type is in a clear mesh (or antique ziplock) bag. These are arranged so that each type can be seen from the outside of the bin. No wasted space at the top of a jar! As they're used and space appears at the top of the bin, I make note of what I'm low on for the next grocery run, and add a recipe for a type I haven't cooked in a while to my meal plan, to keep stocks rotating.
Denise Bustard says
Hi Karey! Wow, I bet you have to be very organized in such a small space. Thanks for sharing!
Mary Davis says
I've just recently discovered your site and LOVE it! Somewhere I was you comment about looking for labelling alternatives for glass containers. This is the best thing I've used yet ... on Amazon search Original Glass Artist Wine Glass Markers. They come in multiple colors and wash off easy with soap and water, or in the dishwasher.
Mary Davis says
Lol, love spell check too ... *saw not was !
Denise says
Thanks for sharing, Mary! I like using Jokari labels from Amazon, or just painter's tape 🙂
Jeanna says
I love this idea and was thinking of buying some mason jars to clean up my pantry and to make some of this delicious foods- such as salads or oatmeals. I had to do some conversion as I have no idea what Oz are because everything we buy in Canada is in ML or Grams. 🙂
Just an idea- Classico Pasta Sauces use standard mason jars (it says 16oz Atlas mason on their jars, but I think they are about 650ml as that's what's on their labels). Now, according to their website, these jars cannot be re-used for canning or freezing, but I thought of using them for storage. Also Last Mountain's Old Fashioned Jam uses Bernardin canning jars and they said on a video these jars can be re-used for canning. I thought this might save anyone from buying canning jars if they don't need to. And you can buy screw bands and snap lids for them.
Thank you so much for this wonderful idea.
Denise says
Hi Jeanna! I think this is a great way to use the type of jars that can't be frozen, like the jam and pasta sauce jars you mention. I bet they'd work really well!
Lisa says
Instead of binder clips for sealing bags, check out sealer sticks. A google search will find many of them. They seal the entire bag top and take up no room in your pantry or drawers as they are the size of a straw.
Denise says
Great tip!
Paula says
This is great! But, I've given up with 2 teenage boys at home. The pantry and my shelves in the kitchen are hopeless since unloading the dishwashing is their chore.
Denise says
Ha ha! Oh gosh, that's a preview for me! I have two boys too!
Paula says
lol, yes! I would go behind them and redo it for a while and got over that quickly. Now, I'm just happy they get it done and I'll save my ocd until they're out of the house! 😉 But I do love a tidy, organized kitchen.
Mary Brannigan says
Thanks for this timely post! I'm tidying my pantry today!
Denise says
It's so therapeutic! Hope you found the post helpful 🙂