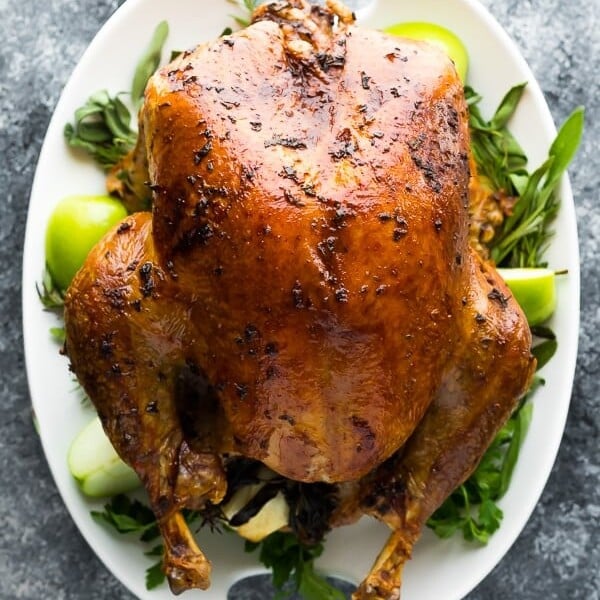
This dry brined turkey with garlic sage butter has step by step photos to help you get the juiciest turkey possible! A dry brine helps lock in the juices with a fraction of the effort that a wet brine requires.
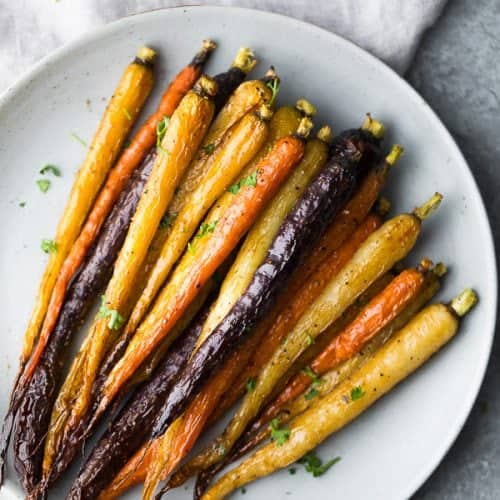
Turkey is one of my favorite holiday meals to cook up, and this dry brined turkey is an easy, go-to recipe that is sure to impress your family and guests. Serve it up with a side of make-ahead apple sage stuffing, and roasted butternut squash, with apple crisp for dessert!
If you want a stress-free turkey that turns out reliably juicy and tender, this is the method you can trust.
I’ve tested this dry brined turkey method more times than I can count, and it delivers the same results every single time. Juicy meat, golden skin, and rich flavor without the hassle of a wet brine.
That consistency is exactly why so many readers come back to it for their holiday table year after year. When you’re hosting, you don’t want guesswork, you want a recipe that’s been proven, refined, and trusted to take the stress out of cooking the centerpiece of your meal.
Why this is the Best Dry Brine Turkey Recipe
- the turkey is guaranteed to be so juicy and flavorful, with deliciously crispy skin
- dry bring turkey is so much easier than a wet brine, and requires less planning and clean up!
- you can start dry brining before the turkey is 100% thawed, which cuts down on prep time
Sage Butter Turkey Ingredients
- Turkey - You can use a 12-20 lb turkey for this recipe. Aim for 1 lb turkey per person (this accounts for bone weight). Pick a turkey that has not been pre-seasoned or injected with anything. Kosher turkeys have already been brined so they are not suitable for this recipe.
- Herbs - sage, rosemary, and thyme are the perfect combination to compliment the flavors of the turkey
- Apple, celery and onion - are stuffed into the cavity of the turkey to infuse it with flavor and moisture while cooking.
- Salt - use kosher salt, not table salt. Be careful with the amount of salt- if you are seasoning the skin of your turkey after rinsing off the brine, make sure you don't use salt. If preparing gravy from the juices, taste before you add any salt.
How to Dry Brine a Turkey
1. Thaw turkey- 3-4 days before serving, thaw the turkey according to package directions.
The day before serving
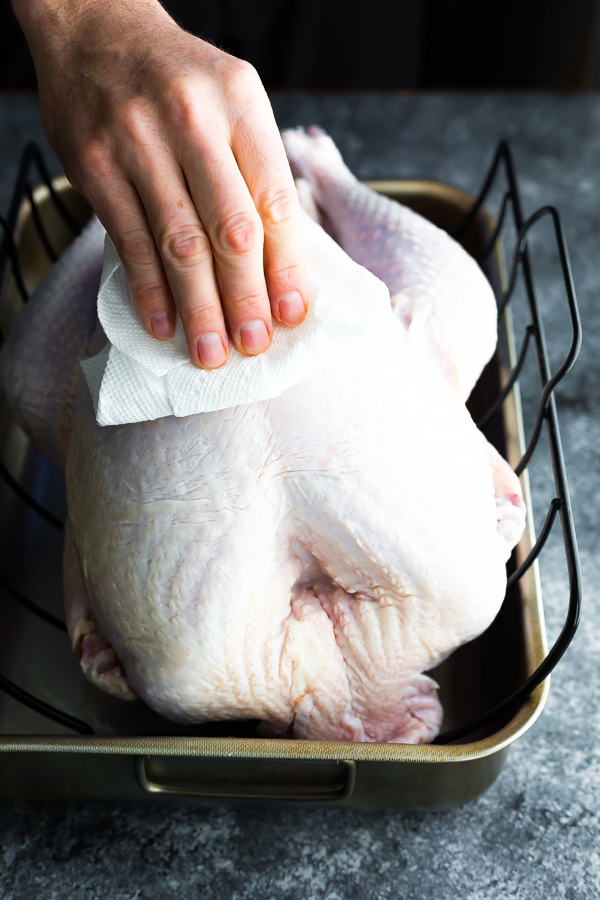
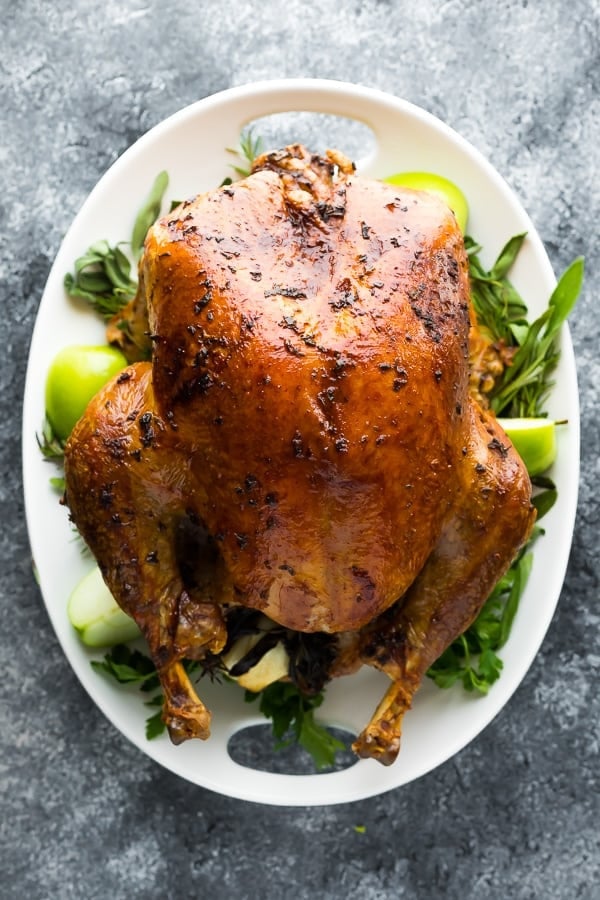
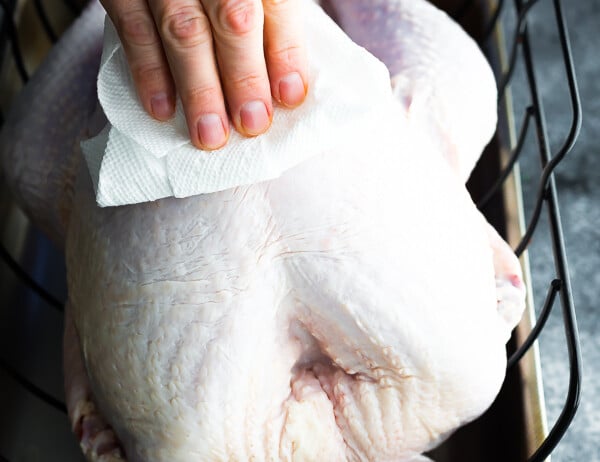
2. Prepare turkey- Pat the turkey dry. Remove the giblet and neck, and set aside for making gravy or stock (if desired). Place the turkey on a rack in a roasting pan.
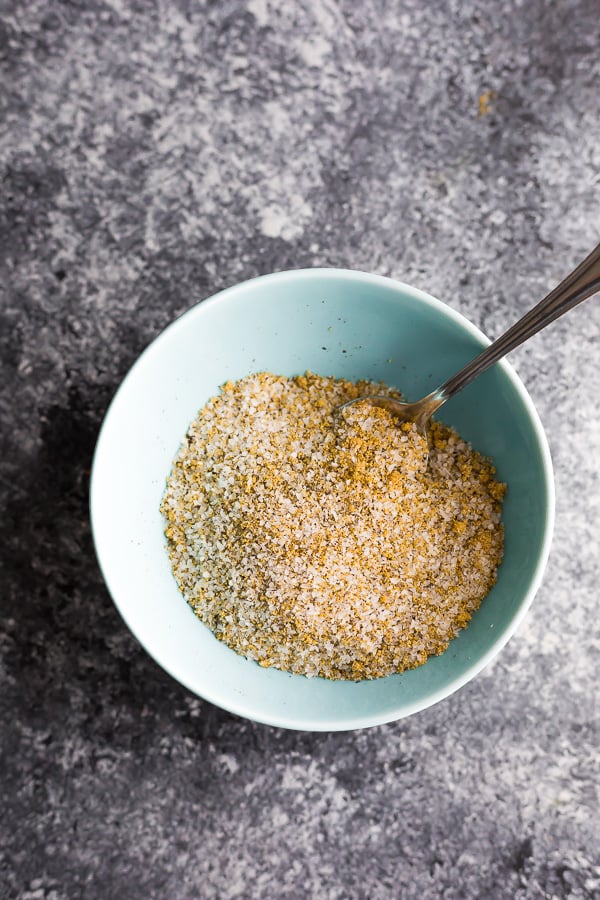
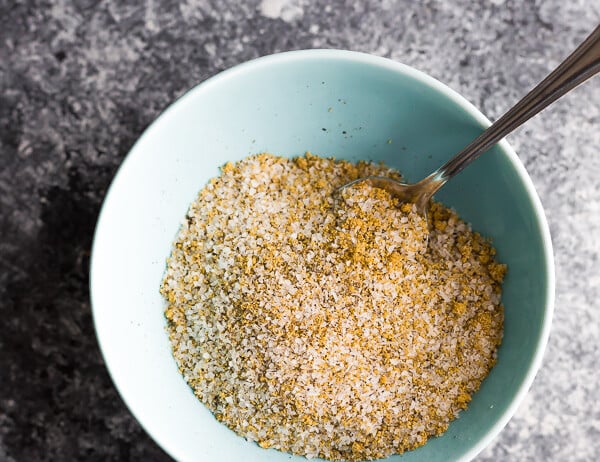
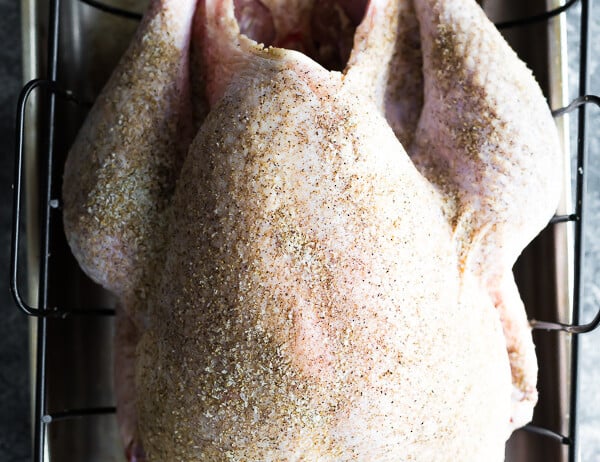
3. Prepare dry brine - Mix together the dry brine, including the salt, brown sugar, and pepper.
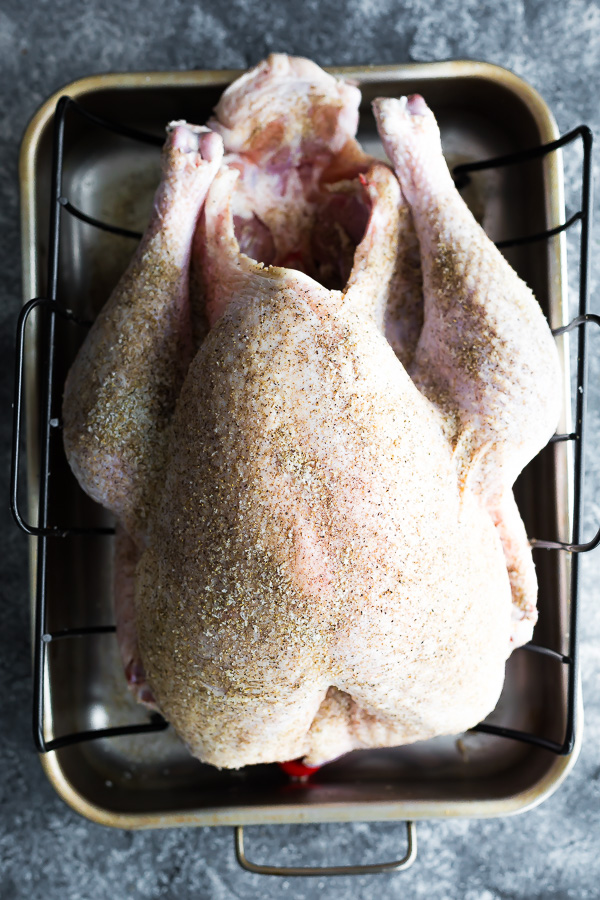
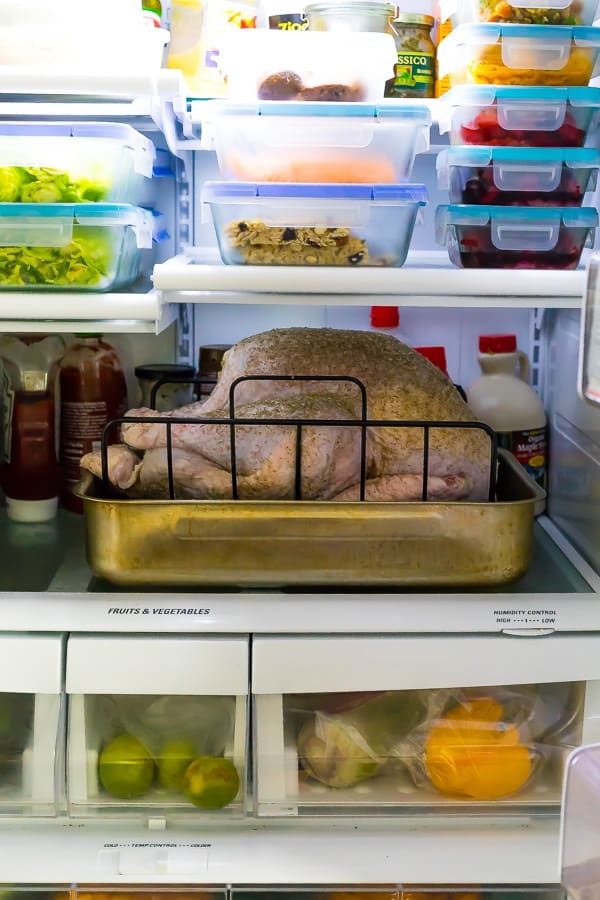
4. Apply dry brine- Rub the dry brine all over the turkey skin (breast & back) and inside the cavity. Let the turkey sit uncovered overnight in the fridge.
The day of serving

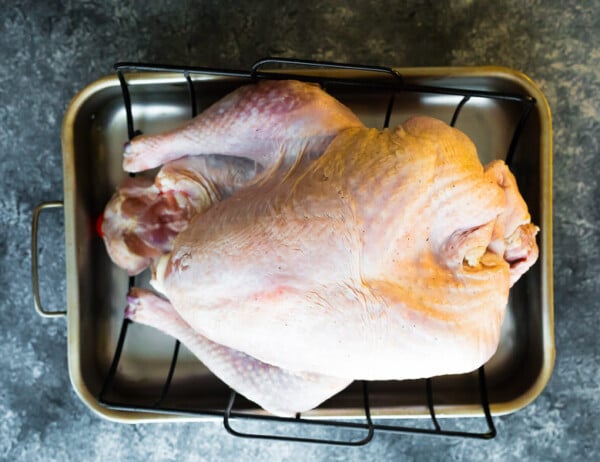
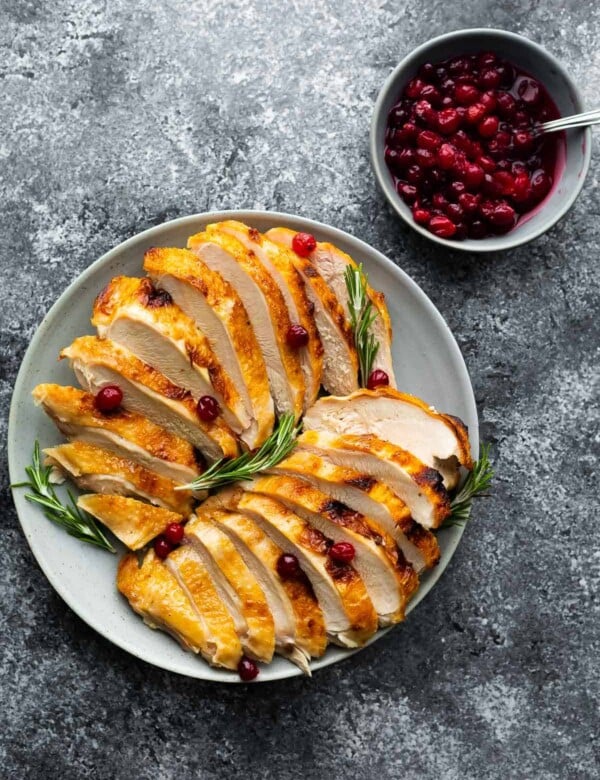
4. Remove brine - Remove the dry brined turkey from the fridge and rinse off the brine (don't forget to rinse the cavity, too). Pat turkey and roasting pan dry. Make sure none of the salty dry brine is in the roasting pan as this can make your pan juices too salty for gravy. Bend the turkey wings backwards and tuck under the bird.
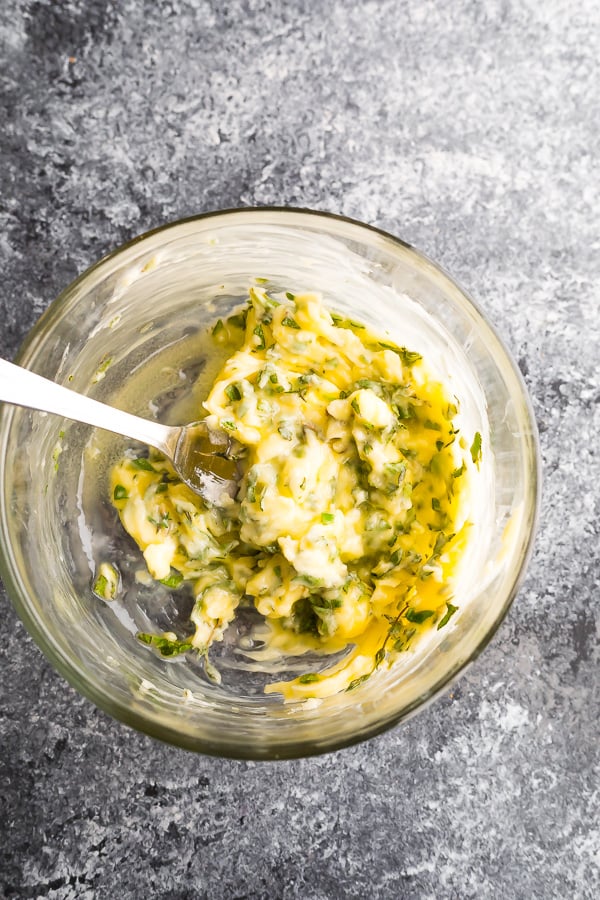
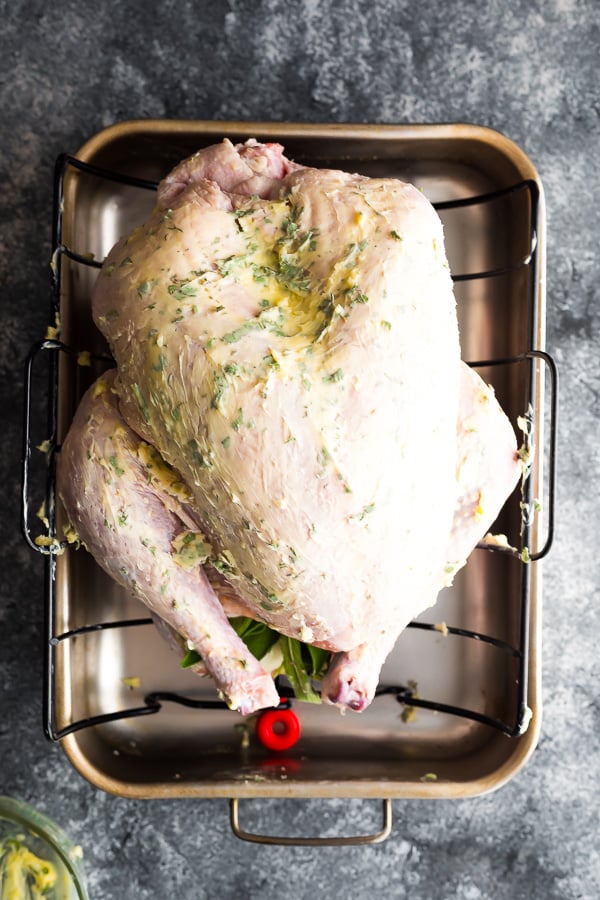
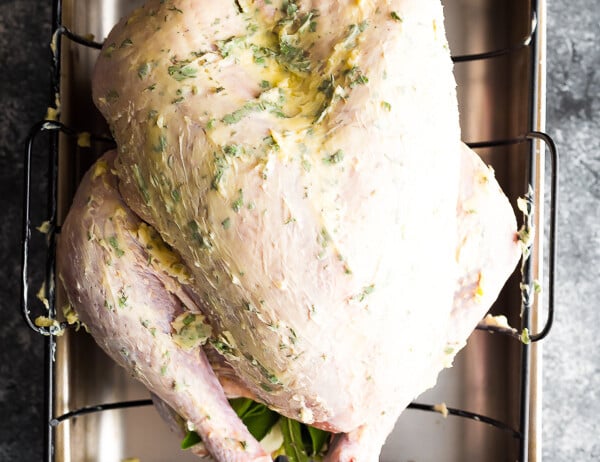
4. Garlic sage butter - stir together the garlic sage butter ingredients including softened butter, sage, thyme, and garlic cloves. Rub the garlic sage butter all over the turkey breast, wings & back. Note: we do not add salt to this garlic sage butter, as your turkey will already be plenty seasoned with salt from the dry brine!
Tip - One way to apply the garlic sage butter is to soak a square of cheesecloth right in the melted butter. Then, lay it over the turkey breast. Keep basting every 30 minutes, and remove the cheesecloth during the last 30 minutes of cooking to brown up the breast meat.
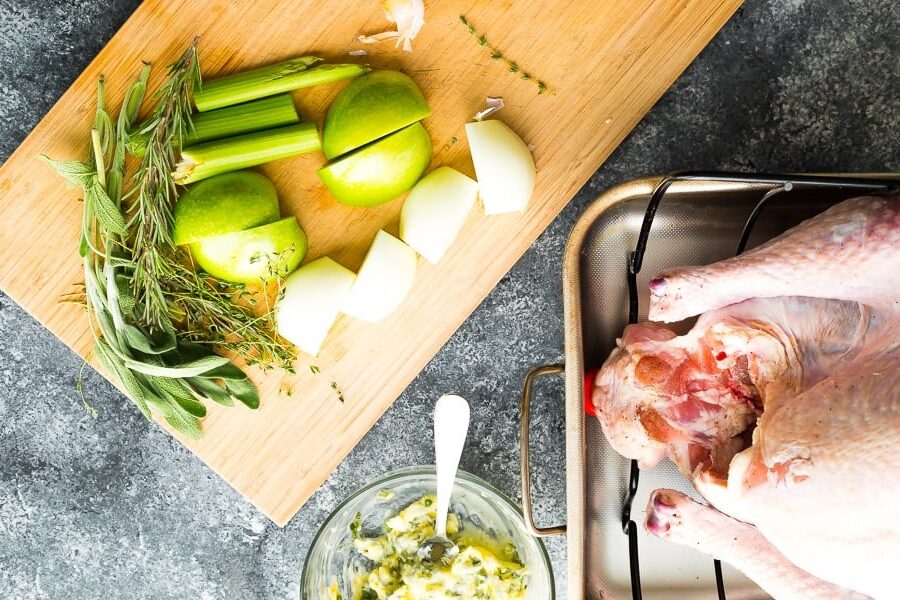
5. Stuff - stuff the cavity of the turkey with the 'cavity' ingredients including onion, apple, celery, thyme, rosemary, and sage. Pre-heat oven to 450ºF. Place turkey in the pre-heated oven, then reduce the temperature to 325°F.
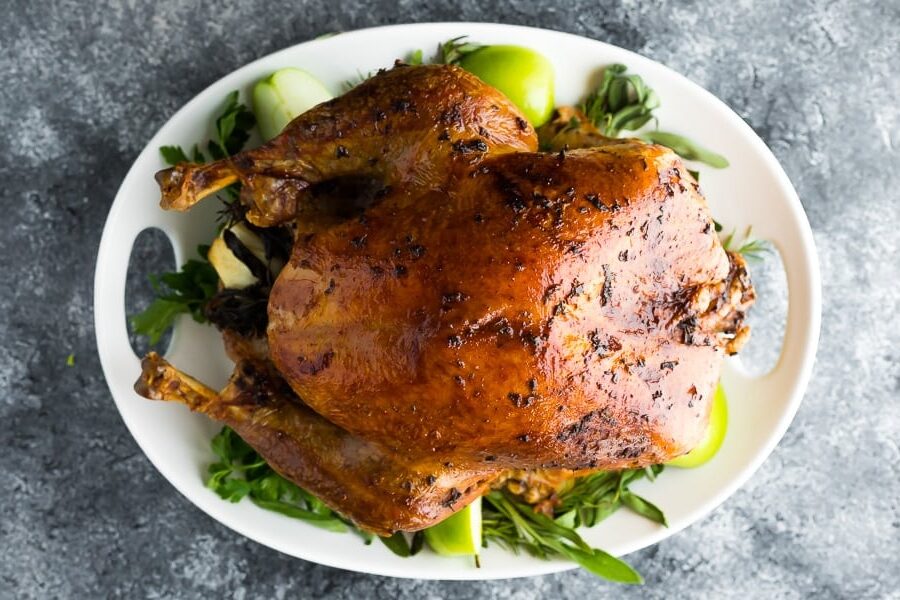
6. Roast turkey - roast for 2 hours, basting with pan juices every 45 minutes, before taking the temperature. Check the temperature in the thickest part of the thigh and the breast, turkey is cooked through when it measures 165°F. For a 14-17 lb turkey, 2 ½-3 hours were perfect.
How long to cook a turkey
Dry brined turkey cooks faster, so make sure to check your turkey's temperature early!
- Check weight - How long to cook a turkey entirely depends on the size and weight of your turkey, so make sure you take a photograph of the tag with the weight of the turkey before you discard the packaging!
- Time per pound - The general rule is to roast turkey for 10-15 minutes per lb HOWEVER since a dry brined turkey can cook quicker, I recommend checking your turkey's temperature early, at around 2 hours.
- To tell if your turkey is done, take the temperature of the thickest part of the thigh. Once it reaches a temperature of 165°F, it's ready to come out of the oven. I found this video helpful in finding the thickest part of the turkey thigh.
- Thermometer - I highly recommend this Digital Instant Read Thermometer to take the temperature of your turkey, and an oven thermometer to make sure your oven is holding the right temperature
For the record, my 17 lb and my 14 lb roast turkeys were both done between 2 ½ -3 hours, hence my recommendation to check your bird's temperature early.
If your turkey is done early, tent it in foil to keep it moist. It will hold the heat for several hours!
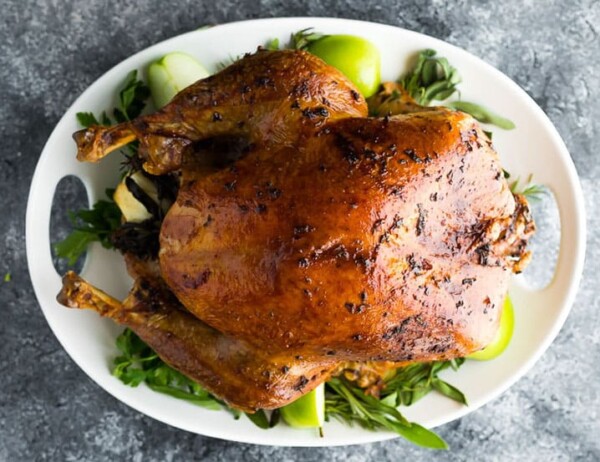
7. Rest - When turkey is cooked through, remove from oven and allow to rest for 30 minutes. If your turkey is done early, tent with foil to keep it warm. If you're just waiting 30 minutes before serving, no need for foil.

Dry Brining Tips
- Salt - it’s absolutely crucial that you use kosher salt and not table salt; otherwise the turkey will be too salty
- Gravy- due to the brine, the juices from the turkey will be too salty to make gravy. If gravy is a non negotiable, seek a recipe that does not include a brine.
- Stuffing - with dry brined turkey, I don't recommend don't stuffing your bird with traditional bread stuffing. This is because brining can make your stuffing extra salty. Instead, we're stuffing the turkey with apple, celery and onion for added flavor.
- Turkey- make sure that you are not using a turkey which has already been brined; check the ingredients on the package and it should simply say ‘turkey breast’
How to Store Leftover Turkey
Fridge - After cooking, cool the turkey completely before storing in an air tight container in the fridge for up to 4 days. Turkey breast is prone to drying out and is best eaten within 48 hours.
Reheating - Heat in the microwave or a frying pan until steaming hot, or heat in a covered dish in the oven at 350°F for 15-20 minutes, until warmed through.
Dry Salt Brine Turkey FAQs
You will need 24-36 hours to dry brine a turkey. Technically you could dry brine as long as 3 days (72 hours), but you should keep it covered all but the last 24-ish hours to prevent losing moisture from evaporation.
Dry brining a turkey means you rub it with a seasoning blend and allow it to sit (refrigerated) for 24+ hours on a baking sheet and rack. Wet brining involves dunking the turkey into a liquid seasoning mixture for 12-24 hours to let it absorb. Both methods give you a delicious, moist, plump bird, but wet brining wet brining is known to be messy to prepare, requires a large bucket or bag to fit the bird + mixture in your fridge, requires more seasonings, and may require two people to maneuver an extra-large bird into a brining bag.
Some argue that a wet brine turkey comes out moister and plumper than the other due to the liquid it can absorb. After years of testing both methods, I can confidently say that the difference isn’t significant enough for me personally to deal with the mess.
You can dry brine a turkey that is not completely thawed, but it should be pretty close. Thawing in the refrigerator requires about 24 hours for every 5 pounds of turkey. If you have a 15-pound turkey, that means you could allow it to thaw for 2 days in the fridge, then spend the last 24-36 hours dry brining in the fridge to finish thawing.
NOTE: If your turkey is still partially frozen, the excess moisture may lead to the brining seasoning dripping off of your turkey in some spots. Consider checking the bird every 8-12 hours and applying additional seasoning if you notice it needs some extra.
For this recipe, I do recommend rinsing the brine off the turkey simply to better control the saltiness of your turkey (and any gravy you intend to make from the drippings). Technically you can leave dry brine on the turkey, but I find that it makes the skin too salty for my taste.
Thanksgiving Meal Plan + Shopping List!
Take the stress out of your Thanksgiving by doing some of the prep work ahead.
- Check out this make ahead Thanksgiving meal plan which comes with a handy printable shopping and prep list
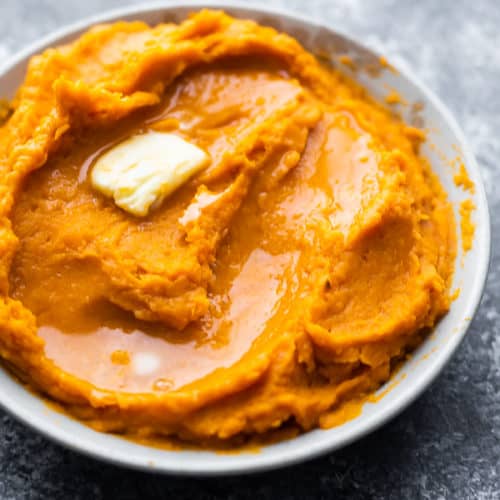
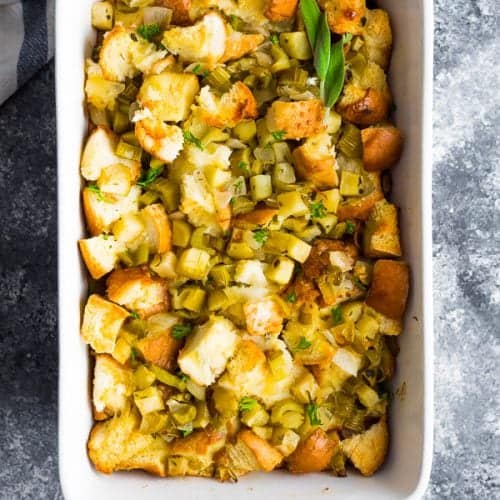
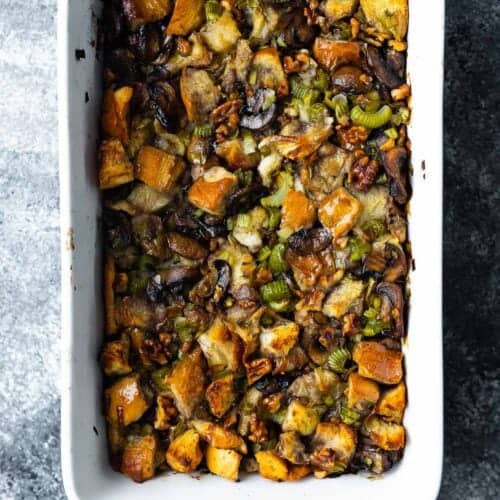
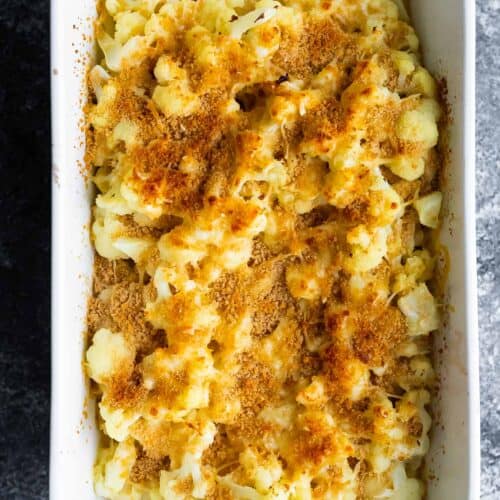
Serve it with

Did you make this? Tag me on social @sweetpeasandsaffron and be sure to leave a comment and rate the recipe!
Best Dry Brine Turkey Recipe
Ingredients
- 1 whole turkey 12-20 lbs; thawed; see note 1
Dry Brine
- ½ cup kosher salt do not use table salt; see note 2
- 1 tablespoon brown sugar
- 1 tablespoon pepper
Garlic Sage Butter
- ½ cup butter softened; salted or unsalted are fine
- ¼ cup fresh sage leaves chopped
- 1 tablespoon fresh thyme leaves
- 2 cloves garlic minced
Cavity
- 1 onion quartered
- 1 apple quartered
- 1 stalk celery quartered
- 5 sprigs fresh tyme
- 1 stem fresh rosemary
- 2-3 sprigs fresh sage leaves
Instructions
3-4 days before serving
- Thaw turkey- 3-4 days before serving, thaw the turkey according to package directions.
The day before serving
- Prepare turkey- Pat the turkey dry. Remove the giblet and neck, and set aside for making gravy or stock (if desired). Place the turkey on a rack in a roasting pan.

- Prepare dry brine - Mix together the dry brine, including the salt, brown sugar, and pepper.
- Apply dry brine- Rub the dry brine all over the turkey skin (breast & back) and inside the cavity. Let the turkey sit uncovered overnight in the fridge.
The day you're serving
- Remove brine - Remove the dry brined turkey from the fridge and rinse off the brine (don't forget to rinse the cavity, too). Pat turkey and roasting pan dry. Make sure none of the salty dry brine is in the roasting pan as this can make your pan juices too salty for gravy. Bend the turkey wings backwards and tuck under the bird.
- Garlic sage butter - stir together the garlic sage butter ingredients including softened butter, sage, thyme, and garlic cloves. Rub the garlic sage butter all over the turkey breast, wings & back. Note: we do not add salt to this garlic sage butter, as your turkey will already be plenty seasoned with salt from the dry brine! See note 3
- Stuff - stuff the cavity of the turkey with the 'cavity' ingredients including onion, apple, celery, thyme, rosemary, and sage. Pre-heat oven to 450ºF. Place turkey in the pre-heated oven, then reduce the temperature to 325°F.
- Roast turkey - roast for 2 hours, basting with pan juices every 45 minutes, before taking the temperature. Check the temperature in the thickest part of the thigh and the breast, turkey is cooked through when it measures 165°F. For a 14-17 lb turkey, 2 ½-3 hours were perfect. see note 4
- Rest - When turkey is cooked through, remove from oven and allow to rest for 30 minutes. If your turkey is done early, tent with foil to keep it warm. If you're just waiting 30 minutes before serving, no need for foil.

Tips:
- This recipe was tested with 6.5 kg (14 lbs) and 7.6 kg (16.7 lbs) turkeys respectively.
- Aim for 1 lb turkey per person (this accounts for bone weight)
Nutrition Information
© Sweet Peas & Saffron - Content and photographs are copyright protected. Sharing of this recipe is both encouraged and appreciated. Copying and/or pasting full recipes to any social media is strictly prohibited.
Shop This Post

Hi, I'm Annie. With a Bachelor of Science degree, a minor in nutrition and nearly 20 year of both classical training, and self-taught experience, I've spent my career proving that home cooking can be practical, delicious and inspiring. What started in 2013 as one food blog has grown into a full-time business. Today, my husband Clayton and I run five food websites that connect with millions of home cooks every month.
When I'm not in the kitchen or behind the camera, I'm using fueling my love of travel, or chasing down new ideas that keep food fun and fresh.

Nikki says
Literally the best turkey any of us ever had! Making this every thanksgiving from now on.
Damali Macias says
Delicious every time
Cyndi Cook says
Could you cook turkey in a turkey bag? Thanks!
Denise says
Hi Cyndi! You know, I've never cooked a turkey in a bag before! I don't see why you couldn't cook it in the bag, but be sure to check on it early. Hope you enjoy!
Lynn says
How do you get butter rub to stay on turkey? Mine just slides off. Do you put under the skin?
Denise says
Hi Lynn! You could definitely take the time to put it under the skin, and this also can help make it more flavorful, but I find with a dry brine it's not necessary. One thing that helps is if you soak a clean wash cloth or cheesecloth (that you will have to throw away after), in the butter/rub and place over the turkey breast. I remove during the last 30 minutes to brown up the breast meat. Really helps! I also baste it every 45 minutes because the rub does melt and run off. But the wash cloth really helps it stick around on top a bit longer 🙂
Lynn Bradshaw says
Thank you! We thought the turkey breast we cooked was the best ever!
Denise says
Nice!!! That's great to hear, Lynn! Thanks for reporting back!
Susan Gniadek says
Would this work for a turkey breast? Thanks for all you do...love your recipes!
Denise says
Hi Susan! I have not tried with a turkey breast, but I don't see why not? However I am not sure on cook times.
Cindi says
Hello,
I am going to try your recipe for Thanksgiving. I'm a little concerned about the fresh garlic burning. You didn't find this to be the case? Also what are your thoughts of using a smaller amount of dried herbs as opposed to fresh? Thank you for all your delicious recipes!
Denise says
Hi Cindi! You can leave it out if you'd like. Sorry for my late reply. Hope you had a happy thanksgiving!